Wednesday, July 3, 2013
Pallet Art for Kitchen
Most of my walls in my house are bare. And it is driving me nuts!
Being that Rob and I barely agree on any piece of artwork, I want to fill the walls without spending much money since we will probably never come to agreement. So..... here's my inspiration behind my project #1 to fill the walls....
Inspiration:
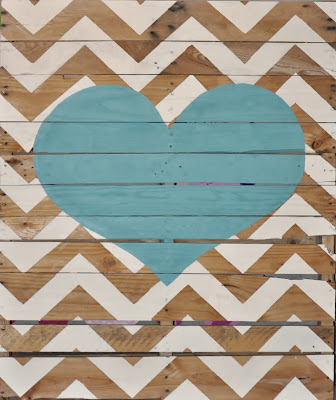
Love it. Love the idea with pallets. Love the chevron. Love the distressed look. Love the white and teal. Done.
Here's my finished product!
The process:
Looked all over internet trying to figure out where to get wood pallets. Actually ran across this charmer at a garage sale for $5. I picked up two, because why not???? I wish the pallets could be closer together with no gaps but the tool needed to do it (that can cut through wood and nail) runs about $150. Sorry but not gonna buy that! So I'll settle on some openings (it won't look too bad once it's up on the teal walls).
So first I made a template on microsoft word.
Then the night before I was scheduled to be induced I got a burst of nesting energy and used Rob's work projector to project the template onto the wood. Then I traced the heart and chevron on with a pencil. Then taped the chevron pattern with painter tape.
Someday during the end of Rob's paternity I painted the stripes white- only one coat to look worn. Of course I run out of paint during the last chevron stripe and it took me 3 weeks to get more paint.
Then outlined the heart in teal (the color of our kitchen walls)and painted it in :)
Ta-da!!!
Now I am onto project have to get the hubs to hang it! Who knows when that will happen but when it does I will take a picture of it in it's new space!
It felt so good to paint and do one of my hobbies. I can't wait for the day when I have more time to craft, paint, doodle and dream up little projects. It will probably be here sooner then I realize.
Much Love,
Jenny
Subscribe to:
Post Comments (Atom)


No comments:
Post a Comment